

Items 0
Total Price
Loyalty Points
By Paul Dunwell, writing for EasyFrame
� Copyright EasyFrame 2018
In 'Frame Academy I' we provided a run-down of essential terminology as a prelude to further 'Frame Academy' pieces that will span more complex aspects of the dark art of picture-framing.
In 'Frame Academy II' we gave you a step-by-step idiot's guide to making a picture frame. It served, alternatively, as a resource to help you understand the processes involved if you go to a 3rd party to have your frames made to your specifications.
Now, in 'Frame Academy III', we're going to show you how to gild a frame. (Ambitious, huh?) That essentially involves the application of thin sheets of metal, something that can transform the frame and elevate its contents. It's an upmarket technique that you might love to learn, and one that you could apply to customising a frame to match existing d?cor and home furnishings ? or just to add an ostentatious touch to framed work that is already precious to you.

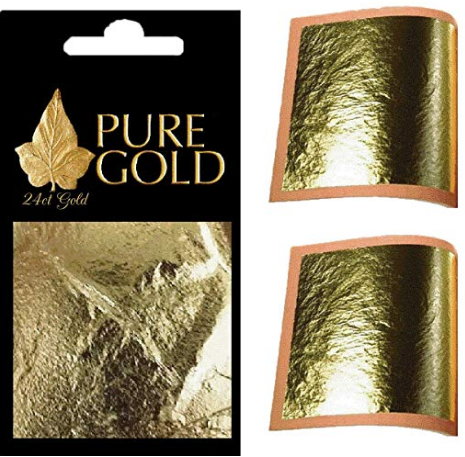
Gilding involves the application of thin sheets of metal. Traditionally this would be done with real gold, platinum or palladium (as well as other platinum-group metals) or silver that had to be hammered by hand so that creating it was a specialist job. But nowadays it's easy to buy imitation precious metal gilding (usually in leaf form or booklets) which has been produced in moments on machinery. It looks the part but is considerably cheaper because it's been mass-manufactured and, moreover, because it's usually been manufactured from cheap base metals such as aluminium, zinc tin or copper.
Gilding is a great makeover for old frames. But there's absolutely no reason why you cannot purchase new frames and effectively upgrade them by giving them the 'precious metal' look. You might even have a bash at carving them first. You'll only find out if you have a flair for such things by trying.
If you're going to have a go at gilding a picture-frame then you'll need the following items:
Coarse sandpaper, a sanding block, a clean cloth, gilding size (in a can or as spray), white gloves, metal leaf (take your pick but do the mathematics before you buy it), a so-called 'chisel brush', a soft fluffy brush (ideally a 'gilder's mop') and acrylic spray sealant. You can also buy solvent to remove excess size but keep it away from the gilding! (N.B. You can use oil-based or water-based size for gilding of anything that's going to stay indoors, otherwise it ought to be oil-based to make it more weather-resistant.)
| SAND the FRAME | You start by roughening the surfaces with some coarse sandpaper, removing any varnish, lacquer or paintwork in the process. You don't want the surface to be too smooth. When you have finished then wipe it off with a damp cloth so you're dust-free. | 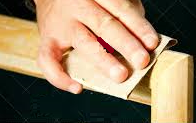 |
| APPLY the GLUE | Use a brush to apply a thin layer of gilding size, a specialist glue, to your item. (See the previous notes about when to use water-based and oil-based sizes.) You can get this in spray form if you have a big area to cover. Make sure this covering is comprehensive, because if you miss an area then the gilding has nothing to stick to and can very easily tear off. You only get one go at this! | 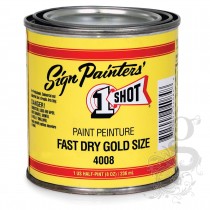 |
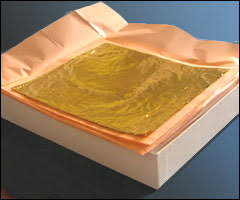
| APPLY the LEAF | Don some white archive-type gloves to avoid leaving prints and press the leaf firmly, with its shiny surface down, onto the size (the glue). If you're a beginner then you can get hold of leaf with a wax backing, and that's a little easier to apply. Use a tapered chisel brush to press the leaf into hard-to-reach areas. | 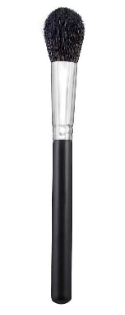 |
| REMOVE the BACKING | When you feel that the leaf has been pressed effectively onto the entire surface, carefully and very slowly remove the wax backing to leave the foil on the surface. You want no tears or holes. If one is going to appear then reverse the process and use the brush again. | 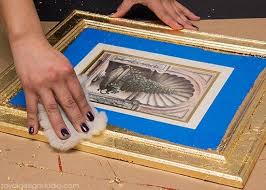 |
| BRUSH AWAY SURPLUS | When you have finished applying the gilding you'll probably have some unused metal. Dust that off with a soft and fluffy brush, ideally what is called a 'gilder's mop'. | 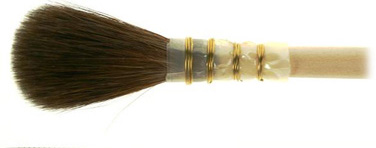 |
| APPLY the SEALANT | Protect your finished gilding from flaking or tarnishing by sealing it with a clear acrylic spray. You again need to ensure that the area is dust-free whilst you do this and for some time afterwards as the sealant dries. | 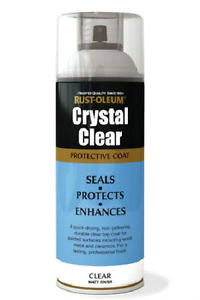 |
Gilding takes time and patience. Work slowly and methodically and you may well manage to execute a decent job at even your first attempt. It's not particularly expensive, you don't need a lot of specialist kit, it's not inherently risky or hazardous, and you should be able to gild your first frame for well under ?100. Thereafter successive attempts are going to be cheaper. It will give you a real sense of achievement too.
DIY-jobs aren't always cost-effective. And, for sure, if you bungle them then they can become inordinately expensive! Your decision to have a go, or not have a go, will be coloured by whether this is going to be fun and a personal challenge that will teach you something.
But DIY's usually fun as well as a great learning experience. And certainly, for those who are prepared to accept full responsibility for their own work, it can develop into more than a hobby.
The alternative to doing it yourself is, of course, to straight go to a professional framer like EasyFrame. You could have them either do the entire job or help with part of it (whatever has left you jittery!)EasyFrame can also certainly supply much of what you need to do the job if you contact them.
EasyFrame is on 01234 856 501 and emailable via sales@easyframe.co.uk.
Article Posted: 03/01/2019 15:51:50